DIY Vertical Garden Project for Small Spaces
Introduction
Why Vertical Gardening?
Have you ever looked at a bare wall in your home and thought, “This space needs something…”? Well, here’s an idea that not only beautifies your home but also brings nature inside – a DIY vertical garden. It’s a smart, space-saving solution for anyone looking to add greenery to small spaces. Whether you’re living in an apartment, a small house, or just want to utilize an empty patio wall, a vertical garden transforms unused vertical space into a lush green oasis.
So, what exactly is vertical gardening? Simply put, it’s growing plants on a vertically suspended panel using hydroponics, soil, or containers. Think of it like a living painting, one that changes with the seasons and adds texture and vibrancy to your surroundings.
Aside from aesthetics, vertical gardens are practical. They improve air quality, reduce indoor temperatures, and can even serve as privacy screens. In kitchens, they’re perfect for growing fresh herbs right at arm’s reach. On balconies, they help block out noise while adding life to concrete jungles.
And the best part? You don’t need to be a pro gardener to get started. With the right guide, a few basic tools, and a touch of creativity, anyone can build their own vertical garden – and that’s what this project is all about.
Planning Your Vertical Garden
Assessing Space and Light
Before jumping into construction mode, planning is everything. Choosing the right location is crucial – it can be the difference between a thriving green wall and a limp, leafless disaster. Start by identifying where in your home or outdoor area you’d like the garden to go. Do you have a sunny balcony, a shady kitchen wall, or an empty fence? Light is your biggest consideration. Most edible and flowering plants require at least 4–6 hours of sunlight per day, while ferns and mosses can tolerate lower light.
If indoors, choose spots near windows or glass doors that get indirect sunlight. North-facing walls may need additional lighting like grow lights. For outdoor vertical gardens, ensure the location isn’t too exposed to strong winds or extreme weather.
Space-wise, measure your wall or frame area. How much room do you have to work with? Keep in mind that once the plants start growing, they’ll need room to breathe. Avoid cramming too many pots into one area; proper spacing is essential for healthy plant growth.
Finally, check your wall’s strength. A vertical garden, when watered, can get heavy. Make sure the wall can support the weight of the frame, soil, and plants. Brick or wooden walls work well, but you can also use a freestanding frame if wall-mounting isn’t an option.
Materials and Tools Needed
List of Basic Tools
Let’s get into the hands-on part. First, gather your tools and materials so you’re not running back and forth mid-project. Fortunately, a vertical garden doesn’t demand a complex toolkit. Here’s your essential list:
Basic Tools:
- Drill and bits
- Screwdriver
- Hammer
- Measuring tape
- Level
- Scissors or garden shears
- Trowel
Each tool plays a key role in setup. The drill and level ensure your frame or wall mount is stable and straight. A trowel helps with planting, and garden shears are useful for trimming roots or cutting liners to size.
Recommended Materials
Now to the fun part – the materials! Depending on the style you choose (wooden frame, pallet, or felt pockets), your material list will vary. For a basic wooden pallet garden:
Materials:
- One wooden pallet or wall-mounted frame
- Landscape fabric or plastic liner (to retain soil)
- Staple gun and staples
- Gardening soil
- Plants or seeds of your choice
- Hooks or screws for mounting
Optional extras include a drip irrigation system for ease of watering, or a waterproof backing if your garden is inside.
Optional Decorative Add-ons
Once your garden’s bones are in place, it’s time to give it personality. Decorative add-ons can elevate your project from simple to stunning:
- Solar-powered fairy lights
- Mini chalkboard plant markers
- Painted pots or frames
- Hanging mason jars
- Decorative stones or pebbles
These extras not only enhance aesthetics but also help organize your garden, especially if you’re growing edibles. Add charm, make it functional, and most importantly – make it yours.
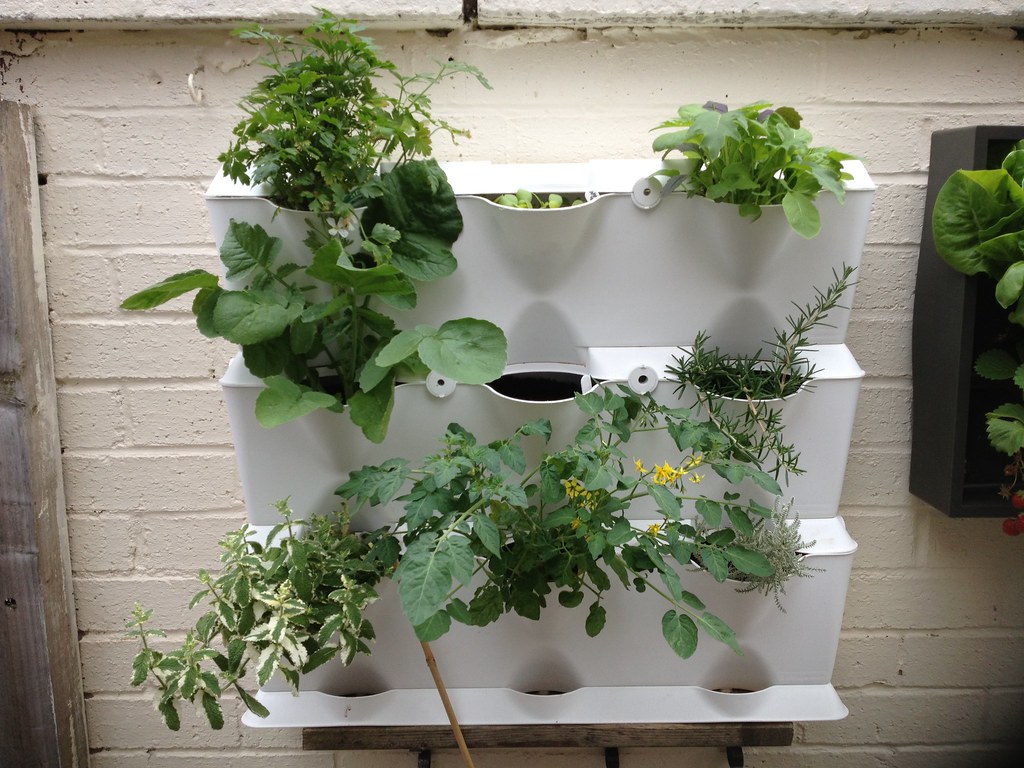
Choosing the Right Plants
Best Plants for Vertical Gardens
Choosing the right plants is essential. After all, your vertical garden is only as good as what grows in it. Start by considering the amount of light your garden will receive. This determines which plants will thrive.
Sun-loving plants (for bright spots):
- Strawberries
- Cherry tomatoes
- Basil
- Rosemary
- Succulents
Shade-tolerant plants (for dim areas):
- Ferns
- Philodendrons
- Pothos
- Mint
- Spider plants
Herbs, Flowers, and Greens
Herbs are perfect for vertical gardens. They don’t need a ton of space, grow quickly, and can be harvested frequently. Popular choices include:
- Basil
- Parsley
- Cilantro
- Thyme
- Oregano
Want more color? Add trailing flowers like petunias, pansies, or nasturtiums. For leafy greens, try:
- Lettuce
- Kale
- Spinach
- Swiss chard
Mixing herbs, flowers, and greens adds visual texture and variety. It also helps with pest control. For instance, basil can repel some insects, and nasturtiums attract beneficial pollinators.
Seasonal Considerations
Plan your plantings by season. In spring and summer, most herbs and vegetables grow well. Fall and winter might require heartier greens or indoor-friendly plants.
Tip: Rotate your plants every season. It refreshes your wall, keeps soil nutrients balanced, and keeps pests from settling in. Vertical gardens aren’t just a project—they’re an evolving ecosystem.
Building the Frame
Wooden Frame vs. Pallet Options
When it comes to structure, you’ve got choices. A wooden frame offers custom sizing and a more polished look. You can build it from scratch or repurpose old furniture. On the other hand, wooden pallets are cheap, easy to find, and have that rustic charm that works great for outdoor or farmhouse-style decor.
Pallets are also beginner-friendly. You can often find them for free at local hardware stores or warehouses. Just be sure they’re heat-treated and chemical-free (look for “HT” stamped on the wood).
Step-by-Step Frame Assembly
How to Assemble a Basic Vertical Garden Frame
Ready to get your hands dirty? Let’s build that structure. Whether you’re using a wooden pallet or constructing a custom frame, the steps are similar. For this guide, we’ll focus on the wooden pallet version, which is affordable, beginner-friendly, and quick to set up.
Step 1: Prepare the Pallet
- Start by sanding the wood thoroughly to remove splinters and rough edges.
- Check for loose nails or broken slats and fix them with screws or wood glue.
- If using indoors, apply a waterproof sealant or liner to protect your walls.
Step 2: Line the Back and Bottom
- Cut landscape fabric or plastic sheeting to fit the back, bottom, and sides of the pallet.
- Staple it securely. This lining holds the soil and prevents water leakage if your garden is indoors.
Step 3: Create Planting Pockets
- You can use additional fabric, small wooden boxes, or even mounted pots to create the spaces where your plants will go.
- Secure each pocket with screws, staples, or hooks, depending on the material.
Step 4: Add Soil and Plants
- Fill each pocket with high-quality potting mix.
- Plant your selections, ensuring roots are covered and soil is slightly compacted.
- Water lightly to test drainage.
Step 5: Mount or Position
- For wall-mounting, use heavy-duty anchors or brackets.
- For freestanding versions, simply prop it against a wall or secure the base with weight.
Building your frame is rewarding. In just a few hours, you’ll have the foundation of something that can bloom and grow for years to come.
Waterproofing and Drainage Tips
Why Drainage and Waterproofing Matter
You’d be surprised how many vertical gardens fail due to poor drainage or water damage. Water is both a plant’s best friend and worst enemy. Too much, and you risk root rot and mold. Too little, and your garden withers. That’s why proper drainage and waterproofing are absolutely essential, especially for indoor setups.
Drainage Essentials
Every container or pocket must have a way for excess water to escape. Here’s how to do it right:
- Drill small holes at the bottom of each planter or pocket.
- Place a layer of gravel or small stones at the base of each container before adding soil.
- Use well-draining soil, not regular garden dirt.
If you’re using a full-frame design (like a pallet), ensure the entire structure is slightly tilted forward to allow water to flow downward and out. Gravity is your friend here.
Indoor Waterproofing Tips
Indoor gardens need extra care. Here’s how to protect your space:
- Line the back of your frame with thick plastic or pond liner to block moisture.
- Use trays or shallow planters at the bottom to catch runoff.
- Apply a waterproof sealant to any wood used in construction.
You can also place your vertical garden in a shallow basin or tray to catch water drips – this is especially helpful in kitchens or living areas where water spillage can be a problem.
Watering and Maintenance
How to Water a Vertical Garden
Watering a vertical garden is different than traditional gardens. Gravity affects how water moves, so the top plants often get more water than the bottom ones. You’ll need to strike a balance and create a consistent routine.
Best Practices:
- Water from the top and let gravity distribute the moisture.
- Water slowly to prevent overflow and runoff.
- Check soil moisture levels regularly—every 2–3 days in summer, weekly in winter.
Tools That Help:
- Use a watering can with a long spout for precision.
- Install a drip irrigation system if you want a low-maintenance solution.
Drip systems are especially useful for larger or outdoor walls. They deliver a controlled amount of water directly to the roots and reduce waste.
General Maintenance Tips
Maintaining your vertical garden doesn’t need to be a chore. Here’s how to keep it lush and beautiful:
- Trim plants regularly to prevent overgrowth and promote air circulation.
- Remove any yellowing or dead leaves to keep things fresh.
- Rotate seasonal plants to keep your garden looking alive year-round.
- Fertilize once a month with a diluted, balanced liquid fertilizer.
Watch for signs of stress like wilting, yellowing, or pests. Catching issues early makes all the difference.
Adding Lighting for Indoor Gardens
Do You Need Extra Lighting?
If your indoor vertical garden is far from windows or in a low-light room, supplemental lighting is your best bet. Not all homes are blessed with natural light in the right places, but that doesn’t mean you can’t grow a stunning indoor garden.
Grow lights mimic the full spectrum of sunlight and can help your plants flourish, even in windowless rooms.
Types of Grow Lights
Here are the most effective types for home vertical gardens:
- LED Grow Lights: Energy-efficient, low heat, and long-lasting.
- Fluorescent Bulbs (CFLs): Affordable and good for small spaces.
- Full-Spectrum Bulbs: Ideal for a variety of plants.
Install your grow lights about 12–18 inches above your plants. Use a timer to mimic natural daylight cycles – 12 to 16 hours of light per day usually does the trick.
Adding lights not only helps your plants grow but also adds ambiance. Soft glows bouncing off leaves can make your room feel magical after sunset.
Decorating and Styling Your Vertical Garden
Turn Function Into Art
Once your vertical garden is thriving, don’t stop there – style it! Think of your garden as living wall art. The right decorative touches can elevate it from a simple project to a stunning home feature.
Here are some creative styling tips:
- Frame it like a picture with a wooden or metal border.
- Mix materials: Use clay pots, metal buckets, and glass jars for variety.
- Add color: Paint your containers or use colorful plant labels.
- Theme it: Mediterranean herbs, tropical ferns, or cottage flowers.
Even changing the arrangement of plants by height, color, or texture adds visual appeal.
Seasonal Themes and Swaps
Swap out plants or accessories based on the season:
- Spring: Daffodils, pansies, and mint.
- Summer: Basil, lavender, and geraniums.
- Fall: Ornamental kale, sage, and small gourds.
- Winter: Evergreen cuttings, pinecones, and fairy lights.
This rotating display keeps your space fresh and festive, no matter the time of year.
Budget Tips and Upcycling Ideas
How to Create a Vertical Garden Without Breaking the Bank
Let’s face it—DIY projects can sometimes go over budget fast. But creating a beautiful vertical garden doesn’t have to cost a fortune. With a little creativity, you can keep things affordable and even make it nearly free by upcycling materials you already have at home.
Start with What You Have:
Look around your garage, shed, or recycling bin. Wooden crates, old shoe organizers, wire baskets, tin cans, and mason jars can all be repurposed as planters. Even old picture frames can serve as a base for a succulent wall or moss garden.
Free or Cheap Materials to Look For:
- Wooden pallets (often free from local hardware stores or markets)
- Leftover fabric or old jeans (can be turned into planting pouches)
- Old gutters or PVC pipes (great for horizontal wall mounts)
- Tin cans and plastic bottles (perfect mini planters)
If you do need to buy something, check thrift stores, dollar shops, or online marketplaces like Facebook Marketplace or Craigslist. You’d be surprised how many people give away materials you can use.
Keep It Minimalist:
Focus on one wall or section at a time. You can always expand later. Start with fast-growing, low-maintenance plants to build your confidence and limit early expenses.
DIY Fertilizer Tip: Use kitchen scraps like banana peels, used coffee grounds, and crushed eggshells to nourish your soil naturally. Not only do you save money, but you also reduce waste.
Troubleshooting Common Problems
Why Isn’t My Vertical Garden Thriving?
Sometimes, even with the best effort, things don’t go as planned. If your vertical garden isn’t doing as well as expected, don’t panic. Most issues are fixable with a little troubleshooting.
Common Problems and Fixes:
- Wilting Plants:
Could be overwatering or underwatering. Use a moisture meter or stick your finger into the soil to check. Make sure your frame has proper drainage. - Yellow Leaves:
Often a sign of poor lighting or nutrient deficiencies. Move the garden closer to a window or add grow lights. Feed with a balanced fertilizer. - Mold or Mildew:
Usually caused by poor airflow or too much moisture. Thin out overcrowded plants and ensure ventilation. Use a natural fungicide if needed. - Dropping Leaves or Stunted Growth:
Could be pests like aphids or spider mites. Inspect plants closely. Spray with neem oil or insecticidal soap to manage infestations.
Pro Tip: Keep a small gardening journal. Record what works and what doesn’t. This will help you fine-tune your routine and track plant progress over time.
Benefits Beyond Beauty
Why a Vertical Garden Is Good for Mind and Body
Sure, vertical gardens are a feast for the eyes—but their benefits go way beyond aesthetics. Gardening, even on a small scale, has been shown to improve mental health, boost air quality, and even enhance productivity.
Mental Health Boost:
Tending to plants reduces stress and anxiety. Watching something grow under your care can be incredibly rewarding. Even just touching soil can increase serotonin levels, the feel-good chemical in your brain.
Physical Health Perks:
- Plants help purify the air, removing toxins like formaldehyde and carbon monoxide.
- They add humidity, which helps with dry skin and respiratory issues.
- Growing herbs and greens at home encourages healthy eating.
Environmental Impact:
Vertical gardens promote sustainable living. You reduce your carbon footprint by growing your own food, using less packaging, and conserving water compared to traditional gardens.
Plus, there’s an undeniable sense of pride in saying, “I built this.” Your green wall becomes a personal sanctuary and a natural escape in your own home.
Expanding Your Vertical Garden
Taking It to the Next Level
Once you’ve mastered your first vertical garden, you might find yourself hooked. Luckily, there are plenty of ways to expand and evolve your garden wall into something even more spectacular.
Ideas for Expansion:
- Build a multi-tiered frame to add more planting space.
- Install vertical planters in other rooms: bathrooms, bedrooms, hallways.
- Start a themed garden wall—like a culinary herb station in your kitchen or a butterfly garden on your porch.
Advanced Upgrades:
- Integrate a smart irrigation system controlled via an app.
- Add solar-powered lighting or sensor-triggered LED lights.
- Incorporate companion planting for pest control and better yields.
Creative Layouts:
- Try a spiral arrangement or zigzag layout for visual interest.
- Mix planters with small shelves to display garden decor.
- Paint the backdrop of your wall for a pop of color or mural effect.
Your vertical garden doesn’t have to stay static. It can grow and evolve with your space, your needs, and your creativity.
DIY Vertical Garden Inspiration Gallery
Get Inspired by Real-Life Vertical Gardens
Still not sure how you want your garden to look? Let’s draw inspiration from real-world examples that show how versatile and stunning vertical gardens can be.
Designs to Explore:
- Rustic Pallet Wall:
Made from reclaimed wood, planted with basil, parsley, and cascading ivy. Works great on farmhouse patios. - Indoor Kitchen Herb Wall:
Metal wall rack with hanging mason jars for herbs like mint, oregano, and thyme. A blend of beauty and function. - Modern Minimalist Panel:
Black frame with sleek geometric planters and ferns. Perfect for office or living room decor. - Upcycled Shoe Organizer:
Hung on a balcony railing, each pocket holds a small plant—low-budget and high-impact. - Succulent Picture Frame:
A shallow box filled with soil and succulents mounted like artwork. A living painting for any wall.
Check platforms like Pinterest, Instagram, or gardening forums for endless ideas. Remember, every garden is unique—yours should reflect your personal style and space.
Conclusion
Creating your own vertical garden is more than just a fun DIY project—it’s a lifestyle upgrade. It brings life, color, and nature into your space, no matter how small it may be. With the right plan, tools, and a touch of creativity, anyone can build a stunning living wall that grows with them.
Whether you’re a green thumb or a complete beginner, vertical gardening offers a flexible, sustainable, and deeply satisfying way to connect with nature. Plus, it’s a fantastic way to repurpose materials, reduce your environmental impact, and create a healthy, beautiful atmosphere at home.
So, grab your tools, pick your plants, and start building. You’ll be amazed at how a simple vertical garden can transform your space—and your mood.
FAQs
Can I build a vertical garden indoors?
Absolutely! Just make sure to provide adequate lighting (natural or artificial) and proper waterproofing to protect your walls.
What are the best plants for beginners?
Herbs like basil, mint, and thyme are low-maintenance. For decorative options, try pothos, spider plants, or succulents.
How often should I water a vertical garden?
It depends on your plant choices and location, but generally, water 2–3 times a week. Monitor moisture levels regularly.
Do vertical gardens attract pests?
Like all gardens, they can, but good airflow, companion planting, and occasional inspection will keep pests at bay.
Can I make a vertical garden without tools?
Yes! Many hanging organizers or pocket-style systems don’t require tools—just a hook or door hanger to get started.