Category: DIY

  • How to Turn Old Wood Into Stunning DIY Pieces

    How to Turn Old Wood Into Stunning DIY Pieces

    How to Turn Old Wood Into Stunning DIY Pieces

    Reclaimed and weathered wood has a story—and with a little vision, you can give it a beautiful new chapter. Whether it’s from pallets, fences, barn boards, or furniture scraps, learning how to turn old wood into stunning DIY pieces opens the door to endless creative possibilities. These projects blend rustic charm with functional design, perfect for any home style from farmhouse to modern.


    Rustic Wall Shelves

    Use narrow planks of old wood to create floating shelves or wall-mounted ledges. Lightly sand the surface to keep its worn character, then seal with a clear coat. Mount with visible metal brackets for an industrial feel, or hide hardware for a sleek finish.


    Reclaimed Wood Headboard

    Stack pallet boards or old fence panels to build a statement headboard for your bed. Mix widths and finishes for an eclectic look, or stain them uniformly for a more polished vibe. It’s a bold way to add warmth and texture to any bedroom.


    DIY Wooden Signs

    Create personalized signs using scrap wood pieces. Paint a background, stencil on a favorite quote or word, and distress the edges for a vintage touch. These are great for gallery walls, entryways, or holiday decor.


    Farmhouse Coffee or Console Tables

    Build a sturdy, character-rich table using reclaimed 2x4s or wide planks. Use a simple rectangular frame and add a weathered top for rustic charm. Finish with hairpin legs for a modern touch or go full farmhouse with crossbeam supports.


    Wood Framed Mirrors

    Turn old trim or pallet wood into a custom mirror frame. Attach wood pieces around a basic mirror using wood glue and finishing nails. Sand the edges, add a stain or paint wash, and hang it in a hallway, bathroom, or above a dresser.


    Wall Art Panels

    Use smaller wood pieces to create geometric designs, chevron patterns, or mosaics. Mount the finished artwork on a board or in a frame for rustic wall decor that doubles as a conversation starter.


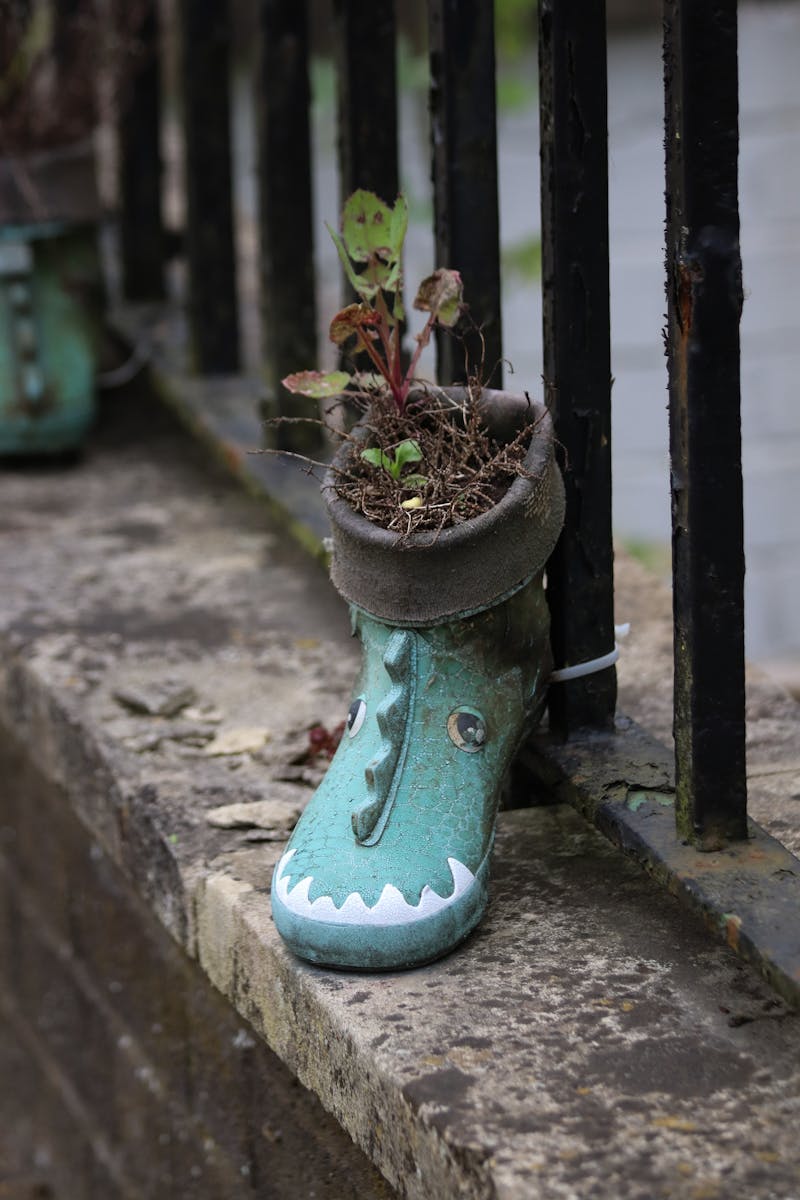
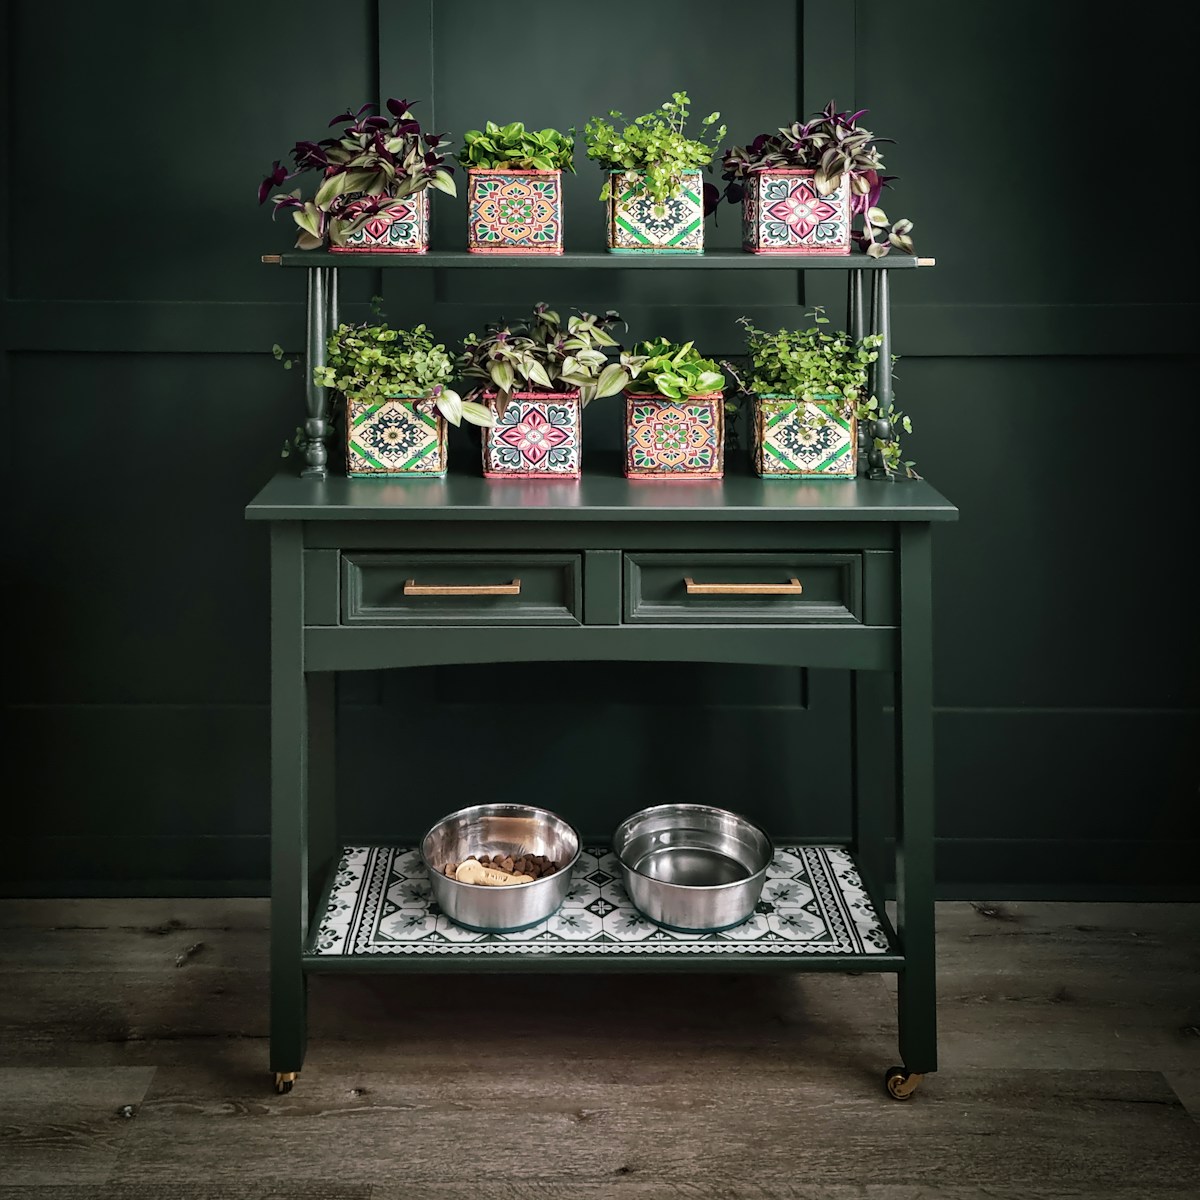
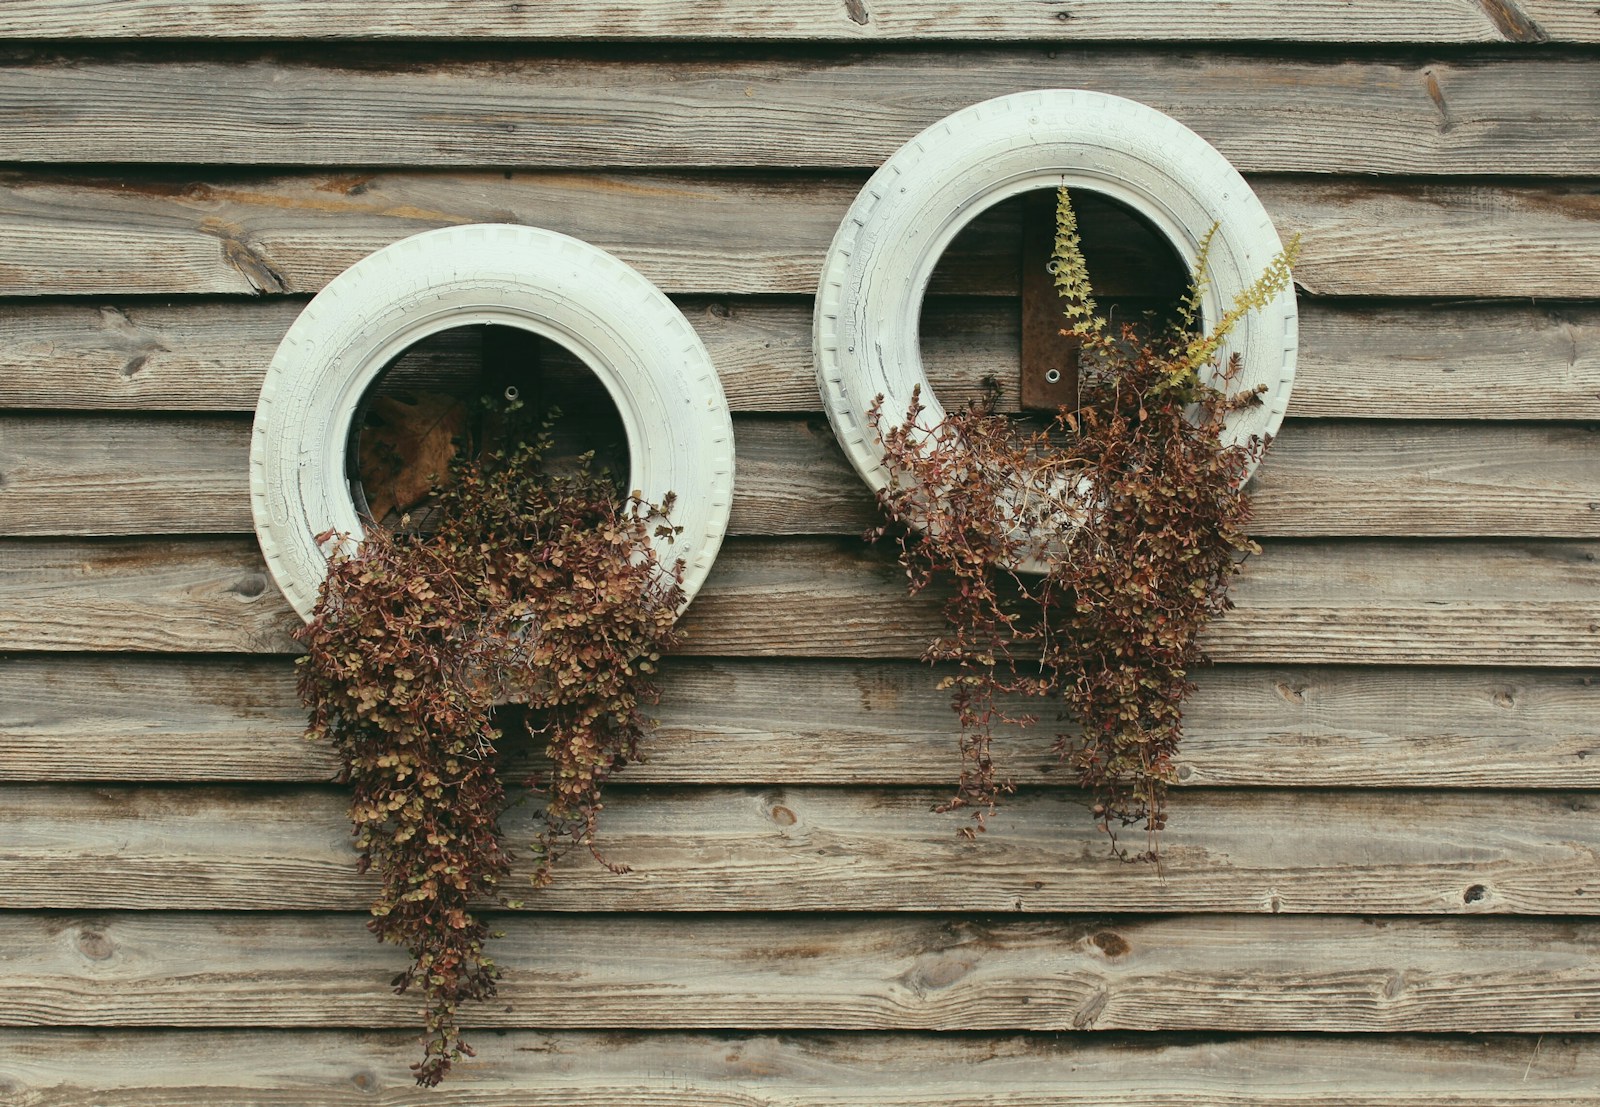
    Planter Boxes and Garden Features

    Build planter boxes, vertical gardens, or herb walls using old boards. Leave the natural grain exposed or paint them in bold colors to make your outdoor space pop. Add wheels for mobility or hang from fences for vertical planting.


    Entryway Bench or Shoe Rack

    Combine reclaimed wood with metal piping or a simple frame to build a functional entryway bench. Use slats for the seating surface and add a lower shelf for shoes or baskets. Sand and seal for durability, especially in high-traffic areas.


    Serving Trays and Kitchen Decor

    Cut old wood into smaller panels for trays, cutting board decor, or utensil holders. Add handles, food-safe sealant, and a little paint or stenciling for a handmade kitchen accent that’s both stylish and practical.


    Conclusion

    Old wood has a warmth and authenticity that new materials just can’t match. Whether you’re building furniture, crafting art, or making small home upgrades, these projects show how to turn old wood into stunning DIY pieces that tell a story. Embrace the imperfections, get creative with finishes, and enjoy the satisfaction of transforming reclaimed wood into something truly beautiful and one-of-a-kind.


    Frequently Asked Questions

    Where can I find old wood for DIY projects?

    Check construction sites, salvage yards, old fences, barns, pallets, or even your own garage. Online marketplaces and curbside giveaways are also great sources.

    How do I prepare reclaimed wood before using it?

    Remove nails or staples, clean with a brush and mild soap, and sand as needed to smooth rough edges. Seal or treat the wood if it will be used indoors or around food.

    Is it okay to mix old and new wood in a project?

    Absolutely. Mixing adds contrast and character—just be sure the thickness and weight are compatible for stability and design balance.

    What finish works best for old wood?

    Clear polyurethane or matte sealants preserve the character of the grain. You can also use whitewash, stain, or chalk paint depending on your desired look.

    Can reclaimed wood be used for outdoor projects?

    Yes, but make sure it’s sealed properly with an outdoor-grade protective finish to prevent rot, moisture damage, or insect issues.

    © 2025 GardeningandDecor.com. All rights reserved.

  • Turning Junk into Treasures: DIY Upcycled Projects

    Turning Junk into Treasures: DIY Upcycled Projects

    Turning Junk into Treasures: DIY Upcycled Projects

    One person’s trash really can become another person’s treasure—especially with a little creativity and some basic tools. These DIY upcycled projects show you how to turn old, forgotten, or broken items into stylish, functional pieces that bring personality and charm into your home. Upcycling is not only eco-friendly and budget-friendly—it’s also incredibly rewarding.


    Suitcase Side Tables

    Vintage hard-shell suitcases make fantastic side tables or nightstands. Just attach wooden legs or stack two together for a layered look. Store books, blankets, or seasonal items inside for hidden storage with retro flair.


    Drawer Wall Shelves

    Remove old dresser drawers, paint or line them with wallpaper, and hang them as floating shelves. The built-in sides add character and structure, making them perfect for displaying plants, books, or small decor pieces.


    Window Frame Decor

    Old wooden window frames can be repurposed into rustic wall art, photo displays, or seasonal decor. Hang wreaths inside, add hooks for keys, or use them as a base for faux stained-glass painting projects.


    Upcycled Shutter Organizers

    Attach an old shutter vertically to a wall and use the slats to hold mail, notes, or cards. Add small hooks at the bottom for keys or hats. This is a stylish way to organize entryways or office corners.


    License Plate Wall Hooks

    Mount vintage or expired license plates to a wood plank and add coat hooks underneath. It’s a great conversation piece and works well in mudrooms, garages, or man caves with a rustic or industrial vibe.


    Tin Can Lanterns

    Punch holes in cleaned tin cans to create patterns, then add a tealight or LED candle. Hang them with wire or place them along walkways for atmospheric lighting with a handmade touch.


    Pallet Garden Planters

    Lean a reclaimed wood pallet against a fence or wall and use the horizontal boards to create pockets for planting herbs, flowers, or succulents. Paint or stencil it for extra personality in your outdoor space.


    Broken Chair Plant Stands

    If a chair is missing its seat or too wobbly to sit on, turn it into a plant stand. Paint it bold, nestle a planter into the frame, and use it as an accent piece indoors or on a porch.


    Jar Lid Magnets or Coasters

    Glue small photos, fabric scraps, or patterned paper inside jar lids. Add magnets to the back or seal the surface with resin and felt to make quirky coasters—great for gifts or personal touches in your kitchen.


    Conclusion

    Upcycling encourages us to see potential where others see waste. From drawers to doors and shutters to suitcases, these DIY upcycled projects prove that style and sustainability can go hand in hand. With just a little imagination and effort, you can breathe new life into old objects and proudly display your creative treasures throughout your home.


    Frequently Asked Questions

    Where can I find junk to upcycle?

    Try garage sales, flea markets, thrift stores, or your own basement or garage. Neighbors and family members may also have items they’re willing to part with.

    Do I need woodworking skills for upcycling?

    Not necessarily. Many upcycling projects only require simple tools like paint, glue, or screwdrivers. Start small and build skills over time.

    How do I know if something is worth saving?

    If the item is sturdy or has a unique shape, texture, or material, it likely has upcycling potential. Damaged finishes or missing parts can often be fixed or replaced.

    Is upcycled decor durable?

    Yes, especially when sealed and finished properly. Use protective coatings on wood or paint for lasting results, especially on items used daily.

    Can I mix upcycled pieces with modern decor?

    Definitely! Upcycled items can add contrast and personality to modern spaces. The key is balance—mix textures and styles thoughtfully for an eclectic, curated look.

    © 2025 GardeningandDecor.com. All rights reserved.

  • Creative Upcycling Ideas for Old Furniture

    Creative Upcycling Ideas for Old Furniture

    Creative Upcycling Ideas for Old Furniture

    That scratched table, chipped dresser, or outdated chair taking up space in your garage? Don’t toss it—transform it. With a bit of creativity and some elbow grease, you can turn old pieces into functional and stylish focal points. These creative upcycling ideas for old furniture help you save money, reduce waste, and craft one-of-a-kind decor for your home.


    Turn Dressers into Bathroom Vanities

    Repurpose an old wooden dresser by removing the top drawers and cutting space for plumbing. Add a sink and faucet, seal the surface, and you’ve got a unique, vintage-style bathroom vanity that adds character and charm.


    Transform Chairs into Plant Stands

    Remove the seat of an old wooden chair and replace it with a planter pot or basket. Paint the frame a fun color or distress it for a rustic look. These repurposed chairs make great porch or garden decor.


    Convert Coffee Tables into Benches

    With a little padding and upholstery fabric, an old coffee table can become a charming bench. Add foam to the top, staple fabric underneath, and consider painting or staining the base to match your decor.


    Make Nightstands from an Old Dresser

    Saw a long dresser in half, add legs or a new base, and you’ll have two unique nightstands. Paint them in coordinating tones for a custom bedroom upgrade with tons of character.


    Repurpose Cribs into Storage Solutions

    Disassembled cribs can be turned into everything from bookshelves to wall organizers. Use crib sides as hanging racks, or transform the base into a bench with built-in storage underneath.


    Create Desk Space from a Vanity Table

    Strip and refinish a vintage vanity to create a charming writing desk or compact workstation. Add new hardware, a fresh coat of paint, and some floating shelves above to complete your mini office setup.


    Refinish Dining Tables with Bold New Looks

    Strip the surface of an outdated table and stain or paint it for a fresh new finish. Consider a two-tone look with a painted base and wood top, or add stenciling or a tiled inlay for a one-of-a-kind touch.


    Build a Bar Cart from a Rolling Cart or Side Table

    Old rolling carts or tiered side tables can easily become chic bar carts. Add wheels, hooks for towels, and a few decorative trays or baskets for glassware and drinks.


    Use Bookshelves as Room Dividers

    Repaint or stencil the back of a tall bookshelf and use it as a freestanding room divider. This works beautifully in studio apartments or open floor plans where you want to add zones without building walls.


    Conclusion

    Upcycling old furniture isn’t just a fun weekend project—it’s a way to bring your personal touch into every corner of your home. From turning dressers into vanities to transforming tables into benches, these creative upcycling ideas breathe new life into forgotten pieces. With a little vision and some DIY spirit, your next statement piece might already be hiding in plain sight.


    Frequently Asked Questions

    What tools do I need for furniture upcycling?

    Basic tools include a sander, paintbrushes, a drill, screwdriver, wood filler, and staple gun for upholstery. Optional items like wood glue or stencils can add extra flair.

    Can I upcycle furniture without sanding?

    Yes—if you use chalk paint or a quality primer, you can skip sanding in some cases. Just be sure the surface is clean and dry before painting.

    Is it worth keeping damaged or chipped furniture?

    Absolutely! Minor damage can often be repaired, covered, or even turned into a design feature with distressing or creative patchwork.

    Where can I find old furniture to upcycle?

    Check thrift stores, garage sales, online marketplaces, or your own basement. Friends and family might also be glad to hand off pieces they no longer need.

    What paint is best for furniture makeovers?

    Chalk paint, latex paint, and mineral-based paints all work well. Always seal with a top coat like wax, polyurethane, or clear acrylic for durability.

    © 2025 GardeningandDecor.com. All rights reserved.

  • How to Repurpose Everyday Items into Beautiful Decor

    How to Repurpose Everyday Items into Beautiful Decor

    How to Repurpose Everyday Items into Beautiful Decor

    Decorating your home doesn’t have to mean buying brand new pieces. With a little imagination and a few simple tools, you can learn how to repurpose everyday items into beautiful decor that’s both creative and budget-friendly. From glass jars to old books, even the most ordinary things can become charming accents that reflect your personal style.


    Mason Jars and Glass Containers

    Mason jars are incredibly versatile and stylish in just about any room. Use them as:

    • Vases for fresh or dried flowers
    • Bathroom organizers for cotton balls or brushes
    • Lanterns with fairy lights or tea lights
    • Herb planters on a windowsill

    Decorate them with twine, chalk paint, or lace to match your theme.


    Wicker Baskets

    Turn unused baskets into smart storage or wall art:

    • Mount shallow baskets as wall decor or shelf backdrops
    • Line deep baskets with fabric for laundry or blanket storage
    • Paint or stencil for a color-coordinated touch

    Old Books and Pages

    Give well-loved books a second life by:

    • Stacking them for table risers or shelf styling
    • Using the covers to make framed art or wall plaques
    • Turning pages into paper flowers, wreaths, or banners

    Wood Crates and Pallets

    Rustic wood is always in style. Use crates and pallet boards to make:

    • Open shelves for kitchens, bathrooms, or entryways
    • Rolling storage bins with added casters
    • Wall-mounted displays or vertical gardens

    Sand and stain for a finished look, or leave rough for rustic charm.


    Tin Cans and Containers

    Don’t toss those tin cans—turn them into:

    • Painted utensil holders
    • Mini planters or succulent displays
    • Desk organizers or craft supply bins
    • Hanging lanterns with punched-out designs

    Vintage Kitchenware

    Old bowls, teacups, and serving trays can become beautiful pieces when repurposed as:

    • Jewelry holders or vanity trays
    • Candle holders or mini succulent pots
    • Tiered stands with stacked plates and candlesticks

    Picture Frames

    Transform unused frames into:

    • Dry-erase or chalkboards
    • Earring or jewelry organizers (add mesh or fabric backing)
    • Wall trays or gallery-style art with fabric or paper inserts

    Clothing and Fabric Scraps

    Don’t let old clothes go to waste—cut them into strips or squares to:

    • Create rag garlands or tassels
    • Wrap around jars, baskets, or plant pots
    • Patch together for throw pillows or wall hangings

    CDs, Records, and Vinyl Sleeves

    Bring retro charm to your home by using records and cases as:

    • Wall decor or statement collages
    • Clock faces or trays
    • Planters with added liners

    Conclusion

    When you learn how to repurpose everyday items into beautiful decor, your home becomes more than just stylish—it becomes a story of creativity and sustainability. With a fresh perspective and a few simple DIY tricks, you can transform ordinary objects into standout pieces that make your space feel personal, warm, and uniquely yours.


    Frequently Asked Questions

    What’s the easiest item to repurpose for decor?

    Mason jars and tin cans are great starter materials—they’re versatile, widely available, and perfect for many craft styles.

    Do I need special tools to repurpose household items?

    Basic tools like scissors, glue, paint, and a hot glue gun are often enough. A drill or sanding block can help with wood projects.

    Can I mix decor styles when repurposing?

    Absolutely! Combining rustic, modern, and vintage elements gives your decor a collected, layered look that feels curated and personal.

    Is it okay to paint or alter vintage items?

    Yes—especially if they’re damaged or not valuable as collectibles. Upcycling gives new life to items that might otherwise be discarded.

    Where can I find materials to repurpose?

    Look in your kitchen, garage, attic, or local thrift stores. Garage sales and flea markets are also goldmines for DIY decor supplies.

    © 2025 GardeningandDecor.com. All rights reserved.

  • DIY Wall Sconces and Decorative Lighting

    DIY Wall Sconces and Decorative Lighting

    DIY Wall Sconces and Decorative Lighting

    Wall lighting is more than just functional—it’s a chance to express your style and bring warmth to your home. With a few supplies and a little creativity, you can craft DIY wall sconces and decorative lighting that elevate any space. Whether you’re going for rustic charm, modern minimalism, or soft ambient glow, these ideas will light up your walls in style.


    Rustic Wood and Mason Jar Sconces

    Attach a stained wood plank to the wall and mount a mason jar using a metal hose clamp or hook. Insert battery-powered fairy lights, flameless candles, or fresh flowers inside. This cozy setup works beautifully in hallways, entryways, or farmhouse-inspired bedrooms.


    Industrial Pipe Sconces

    Create bold, urban-style sconces using black iron pipes and flanges. Mount them on wood backing and top with Edison bulbs. Pair with a plug-in socket kit for easy installation—no hardwiring needed. These add a dramatic flair to offices, kitchens, or loft-style living rooms.


    Wicker Basket Wall Lights

    Turn small woven baskets into sconce shades by cutting a hole in the bottom and inserting a socket. Use a wall-mounted cord set or battery puck light inside. The woven texture casts soft, patterned light—ideal for boho or beachy spaces.


    Vintage Book or Frame Sconces

    Mount an open book or an ornate frame to the wall as a backdrop. Attach a small lamp base or LED puck light to highlight the piece. This creative sconce doubles as wall art and works great in reading nooks or home libraries.


    Modern Minimalist Sconces

    Use clean, geometric shapes like circular wood discs, acrylic panels, or matte metal to create sleek, modern wall lighting. Attach LED strips or round puck lights for low-profile elegance in bedrooms, hallways, or bathrooms.


    Macramé Wall Lanterns

    Knot cotton rope into a small macramé holder to hang glass jars or globe lights. Mount the holder to a wooden dowel or decorative hook. Add a battery candle or solar-powered bulb for soft, warm light with a handmade touch.


    Repurposed Tin or Metal Sconces

    Use old tins, cheese graters, or metal colanders as light covers. Mount them to a wood panel or directly to the wall, then insert LED bulbs or tap lights. The perforated metal creates beautiful shadow play—perfect for rustic or eclectic styles.


    Plug-In Art Light Sconces

    Install a swing-arm lamp above framed artwork or photos to highlight your favorite pieces. Customize the shade with paint or fabric to match your decor. These add gallery vibes to living rooms, staircases, or home offices.


    Shadow Box Light Frames

    Create depth and drama by inserting LED strip lights into a shadow box. Display cutouts, pressed flowers, or paper art inside for glowing dimensional decor. Mount on walls or prop on shelves for a backlit effect that adds interest to any room.


    Conclusion

    DIY wall sconces and decorative lighting offer a perfect blend of style and function. With a little imagination and a few easy-to-find materials, you can create lighting that highlights your personality, fits your space, and adds warmth to any wall. Whether subtle or bold, handmade lighting adds a thoughtful glow that makes your home feel uniquely yours.


    Frequently Asked Questions

    Do I need electrical experience to make DIY wall sconces?

    No! Many projects use plug-in kits or battery-powered lights. If you’re using hardwired components, consult an electrician for safety.

    Where can I find materials for these projects?

    Thrift stores, craft shops, hardware stores, and your own recycling bin are great places to source jars, wood, fabric, and metal pieces.

    Can I install sconces without drilling into the wall?

    Yes—use adhesive hooks, removable wall mounts, or command strips for lightweight sconces with battery lights.

    What type of bulbs are safest for DIY sconces?

    LEDs are ideal—they produce minimal heat, are energy efficient, and come in various shapes and colors to match your style.

    How can I make my lighting feel cohesive throughout my home?

    Use a consistent finish or material (like wood, black metal, or fabric) across fixtures in different rooms for a unified look.

    © 2025 GardeningandDecor.com. All rights reserved.

  • Creative DIY Lighting for Every Room

    Creative DIY Lighting for Every Room

    Creative DIY Lighting for Every Room

    Lighting has the power to completely transform a room—not just in brightness, but in mood and style. With creative DIY lighting for every room, you can make your home feel more personalized, cozy, and functional. Whether you’re looking to warm up your living room, add magic to a child’s bedroom, or highlight your kitchen island, these ideas will light the way—literally!


    Living Room: Statement Pendant or Wall Sconce

    Create a bold focal point with a DIY pendant light made from a woven basket, paper lantern, or metal frame. Or install wall sconces using plug-in kits and thrifted candle holders or jars for a cozy, ambient glow that’s perfect for movie nights and reading nooks.


    Bedroom: Soft Glow and Mood Lighting

    Wrap string lights in sheer fabric or tuck them behind a headboard for a dreamy look. For bedside tables, turn vintage jars or wood blocks into touch lamps with smart bulbs for color-changing control and dimmable effects.


    Kitchen: Functional and Stylish Illumination

    Use upcycled colanders, mason jars, or wine bottles as hanging pendant lights over your island or sink. You can also add under-cabinet LED strips for sleek task lighting that brightens prep areas while keeping a modern, minimalist feel.


    Dining Room: DIY Chandelier or Table Candles

    Make your own chandelier using a metal ring, string lights, and hanging crystals or beads. Or create centerpieces with LED tealights nestled in decorated jars, bowls of citrus slices, or concrete vessels for a clean, modern look that still feels homey.


    Bathroom: Subtle Sparkle and Soft Light

    Line a mirror with LED strip lighting for a Hollywood glam effect, or hang pendant bulbs inside mason jars with frosted glass to diffuse brightness. For a spa feel, add battery-operated candles in corners or around the tub using waterproof containers.


    Entryway: Welcoming Accent Lights

    Install a DIY wall sconce or ceiling light using a basket shade, wood mount, or geometric frame. Use smart bulbs to schedule lighting so your home always feels inviting when you walk through the door.


    Kids’ Rooms: Whimsical and Safe

    Turn string lights into hanging clouds, stars, or animals using paper or felt cutouts. Add fairy lights to wall shelves or bed frames. For added fun, use color-changing bulbs or projection nightlights for imaginative play and bedtime routines.


    Office or Workspace: Bright and Focused

    Create a task lamp using metal piping or a wooden frame, or customize a desk lamp with a hand-painted shade. Use clamp lights for flexible illumination or add a strip of LED tape along the back of your monitor for soft, eye-friendly glow.


    Patio or Balcony: Outdoor Vibes on a Budget

    Wrap string lights around pergolas, railings, or tree branches. Use mason jars or lanterns with solar-powered LEDs to create a warm glow without needing outlets. For a bistro vibe, hang café lights across the space using poles or hooks.


    Conclusion

    Every room in your home can benefit from the charm and practicality of custom lighting. With these creative DIY ideas, you can enhance the atmosphere, add a personal touch, and illuminate your space in ways that match your lifestyle and aesthetic. Whether you want cozy, modern, whimsical, or rustic, the perfect DIY lighting solution is just a project away.


    Frequently Asked Questions

    What’s the easiest DIY lighting project to start with?

    Try mason jar lights, string light displays, or plug-in sconces—they’re beginner-friendly and require minimal tools.

    Can I use battery-operated lights instead of wired ones?

    Yes! Battery and solar-powered lights are great for renters, outdoor spaces, or areas without easy access to outlets.

    What kind of bulbs work best for DIY fixtures?

    Use LED bulbs for energy efficiency, Edison bulbs for vintage vibes, or smart bulbs for color and brightness control.

    How can I safely install DIY lighting?

    Always follow safety guidelines and product instructions. Stick to plug-in or battery options if you’re unsure about electrical wiring.

    Where can I find parts for DIY lights?

    Check hardware stores, thrift shops, craft stores, or online kits for sockets, cords, bulbs, and decorative materials.

    © 2025 GardeningandDecor.com. All rights reserved.

  • How to Make Your Own Customized Light Fixtures

    How to Make Your Own Customized Light Fixtures

    How to Make Your Own Customized Light Fixtures

    Lighting doesn’t just brighten a room—it sets the tone for your space. With a little creativity and a few basic tools, learning how to make your own customized light fixtures lets you create beautiful, functional pieces that reflect your unique style. Whether you’re updating an old lamp or designing something completely original, these DIY ideas will help you shine a little brighter—literally.


    Start with a Vision

    Before you grab your tools, consider the purpose and mood of the space. Do you want soft ambient lighting, a dramatic statement piece, or a practical task lamp? Look for inspiration in your home’s color palette, textures, and design style—whether it’s modern, farmhouse, boho, or industrial.


    Gather Basic Supplies

    While your exact materials will depend on your design, here are some go-to DIY lighting essentials:

    • Lamp kit (cord, socket, switch)
    • Light bulbs (Edison, LED, color-changing, etc.)
    • Fixture base (wood, metal, ceramic, bottle, basket, etc.)
    • Drill and bits for wiring
    • Glue gun or epoxy
    • Spray paint or finishes (optional)
    • Safety gloves and goggles (especially for cutting or wiring)

    Transform Everyday Objects

    One of the easiest ways to customize a fixture is by turning an existing object into a lamp base or shade:

    • Glass bottles or vases for chic table lamps
    • Colanders, baskets, or bowls as pendant shades
    • Books, driftwood, or concrete blocks for unique bases
    • Wire cages or birdcages for industrial flair

    Design Custom Lampshades

    Revamp or build your own lampshade with fabric, paper, or natural materials:

    • Wrap an old shade in patterned fabric or wallpaper
    • Use twine, yarn, or ribbon for a woven texture
    • Create a geometric frame from metal rods or dowels
    • Stencil, dye, or paint your own patterns on canvas shades

    Create Plug-In or Battery-Powered Fixtures

    If you’re not comfortable with hardwiring, use plug-in kits or battery-operated puck lights. These are ideal for renters or quick projects. You can hang pendant lights with swag hooks, mount sconces with Command strips, or tuck battery lights inside handmade shades or lanterns.


    Customize Fixture Finishes

    Use spray paint or rub-on finishes to match your fixture’s hardware to the rest of your room. Try matte black for modern, brushed gold for glam, or whitewash for coastal or farmhouse styles. A simple color update can make even thrifted pieces look designer-level.


    Add Decorative Elements

    Turn your fixture into a true conversation piece by incorporating unique design touches:

    • Glue crystals, beads, or wooden accents for extra texture
    • Use washi tape or vinyl decals to add color or patterns
    • Install dimmers or smart bulbs to change color and brightness
    • Add macramé fringe or fabric tassels for a soft, boho feel

    Test and Display

    Once your fixture is assembled, test all wiring and connections. Place the lamp or hang your fixture in the space and adjust for height, angle, and brightness. Always follow safety instructions—especially when working with electricity or heat-producing bulbs.


    Conclusion

    Customized light fixtures let you illuminate your home with personality. Whether you’re repurposing a flea market find or building something entirely from scratch, the possibilities are endless—and completely you. With just a bit of inspiration and some hands-on work, your lighting can become a functional work of art.


    Frequently Asked Questions

    Is it safe to make your own light fixtures?

    Yes, if you follow all wiring instructions and use certified kits or battery-powered components. When in doubt, consult a licensed electrician.

    Do I need to hardwire my DIY light fixture?

    Not necessarily. Plug-in kits or battery-operated lights are great alternatives that are renter-friendly and require no electrical installation.

    Can I customize an old lamp?

    Absolutely! You can paint the base, change the shade, or replace the cord and socket to give it new life and style.

    Where can I find affordable lamp parts?

    Try hardware stores, craft shops, online marketplaces, or salvage centers. Lamp kits are inexpensive and include everything you need.

    What’s the easiest type of DIY fixture to start with?

    Table lamps and plug-in pendant lights are great for beginners. They’re simple to assemble and don’t require wiring into the wall or ceiling.

    © 2025 GardeningandDecor.com. All rights reserved.

  • DIY Table Lamps, Pendant Lights, and Chandeliers

    DIY Table Lamps, Pendant Lights, and Chandeliers

    DIY Table Lamps, Pendant Lights, and Chandeliers

    Lighting is one of the most powerful ways to define a space—and with a few tools and some creativity, you can create custom fixtures that suit your style perfectly. These DIY table lamps, pendant lights, and chandeliers combine form and function, offering mood-boosting glow with a personalized touch. Whether you love modern, rustic, boho, or vintage, there’s a DIY lighting project for every vibe and budget.


    Upcycled Table Lamps

    Transform household items like vases, wine bottles, or ceramic pitchers into table lamps with a DIY lamp kit (available at most hardware stores). Drill a hole or use adhesive to secure the cord, then top it off with a shade. For a cohesive look, paint or wrap the base in fabric, rope, or wallpaper that matches your decor.


    Wood Block or Log Lamps

    Use a reclaimed wood block or log as a lamp base for a cozy, rustic aesthetic. Sand the surface smooth, drill a center hole for the cord and socket, and finish with a clear sealant. Add an Edison bulb or linen shade for that perfect modern cabin vibe.


    Hanging Pendant Lights

    Pendant lights are surprisingly easy to make and install. Try using items like metal colanders, wicker baskets, wire cages, or glass bowls as shades. Pair with pendant light cords (plug-in or hardwired) and hang from ceiling hooks or wall-mounted brackets for a minimalist look.


    Macramé Pendant Lamps

    For a soft, boho feel, wrap a wire frame with cotton macramé cord in knots or fringe patterns. Add a pendant socket kit and suspend it above a reading nook or bedside table. You can dye the cord to match your color scheme or leave it neutral for a natural vibe.


    Drum Shade Chandeliers

    Convert a large drum lampshade into a chandelier by attaching a pendant light kit and dressing the frame with beads, crystals, feathers, or fabric strips. It’s a chic way to add drama to dining rooms or bedrooms without the cost of a designer fixture.


    Branch and String Light Chandeliers

    Bring the outdoors in with a nature-inspired chandelier. Suspend a thick branch horizontally and wrap it with twinkle lights, greenery, or lightweight bulbs. Hang it with chains or rope for a whimsical centerpiece above a dining table or patio.


    Industrial Pipe Lamps

    Use black iron pipe fittings to build a unique table lamp or wall sconce with a vintage, steampunk edge. Combine elbows, tees, and flanges to create a custom shape, then screw in an exposed bulb and wire with a basic lamp cord kit.


    Wine Bottle Pendant Lights

    Cut the bottoms off empty wine bottles using a glass cutter and sand the edges smooth. Insert a pendant light cord and hang in a row over a kitchen island or bar. Choose bottles in different colors for a stained-glass effect when lit.


    Basket or Rattan Chandeliers

    Turn oversized baskets or rattan bowls into lightweight chandeliers by flipping them upside down and attaching pendant sockets inside. The woven texture casts beautiful shadows, making this a great option for boho, tropical, or rustic spaces.


    Conclusion

    Whether you’re crafting a bedside lamp from a vintage vase or installing a handmade chandelier over your dining table, DIY lighting projects offer endless ways to reflect your personal style. With a few supplies and a bit of imagination, you can create lighting that’s both functional and fabulous—while saving money and adding custom charm to your home.


    Frequently Asked Questions

    Do I need electrical skills to make DIY lighting?

    Basic lighting kits are beginner-friendly and safe to use. Always follow instructions carefully and consider plug-in options to avoid hardwiring.

    What tools do I need for most DIY lighting projects?

    Common tools include a drill, screwdriver, wire stripper, pliers, glue gun, and paint supplies. A glass cutter may be needed for bottle projects.

    Can I make lighting with battery or solar power?

    Yes! Many projects can be adapted for battery-operated LED lights or solar string lights—great for outdoor or cordless indoor solutions.

    Where can I find parts for DIY lamps?

    Home improvement stores, online retailers, or lamp kits sold at craft stores are excellent sources for cords, sockets, bulbs, and hardware.

    How do I safely mount or hang a chandelier?

    Use ceiling anchors, proper chain weight ratings, and follow any instructions included with pendant or chandelier kits. For heavy fixtures, secure into ceiling joists or get professional help.

    © 2025 GardeningandDecor.com. All rights reserved.

  • DIY Jewelry and Accessories to Personalize Your Style

    DIY Jewelry and Accessories to Personalize Your Style

    DIY Jewelry and Accessories to Personalize Your Style

    Why settle for mass-produced when you can make something that’s truly one-of-a-kind? With a little time and creativity, DIY jewelry and accessories let you express your personality, experiment with trends, and craft meaningful pieces that reflect your unique look. Whether you’re new to crafting or a seasoned maker, these projects are fun, wearable, and totally customizable.


    Beaded Bracelets and Anklets

    All you need are elastic cord, beads, and scissors to make colorful, stackable bracelets and anklets. Choose from glass, wooden, or clay beads and personalize with initials, charms, or birthstones. It’s a great beginner project that makes for thoughtful gifts too.


    Wire-Wrapped Rings

    Using jewelry wire and pliers, wrap stones, crystals, or beads to create delicate rings. Practice different wrapping styles to shape elegant or boho designs. This project lets you play with color and texture—and gives you a custom piece in under 30 minutes.


    Statement Earrings

    Make your own earrings using earring hooks, jump rings, and lightweight materials like polymer clay, tassels, or wood cutouts. Use clay to sculpt geometric shapes, flowers, or abstract designs—then bake, paint, and seal for one-of-a-kind accessories.


    Hair Clips and Barrettes

    Upgrade plain clips with fabric, faux pearls, rhinestones, or pressed flowers. Use hot glue to attach your embellishments to alligator clips, snap clips, or bobby pins. These are perfect for adding a handmade touch to any hairstyle.


    Layered Necklaces

    Combine chains of different lengths with pendants, charms, or bead accents to create a trendy layered necklace set. Use lobster clasps and jump rings to connect everything. Try mixing metals, textures, or adding a personal element like an engraved charm.


    Scrunchies and Fabric Headbands

    Sew your own scrunchies or headbands using soft cotton, velvet, or patterned fabric. Add elastic and a few stitches, and you have a fashionable, comfortable accessory that matches any outfit. Great for using fabric scraps or coordinating with your wardrobe.


    Charm Keychains or Bag Tags

    Use beads, tassels, or small trinkets to create fun keychains or bag accessories. Add letter beads for names or affirmations. Clip them onto backpacks, purses, or keys to add personality and flair.


    Button or Resin Brooches

    Turn vintage buttons, pressed flowers, or mini collages into wearable brooches. Glue your design onto a brooch pin or embed it in resin for a glossy, durable finish. It’s a fun way to recycle small treasures into standout pieces.


    Personalized Jewelry Dishes

    Use air-dry clay to form small trinket dishes. Shape and paint them to match your style, then seal with a gloss finish. These are perfect for holding your handmade rings, earrings, or favorite everyday accessories.


    Conclusion

    Creating your own jewelry and accessories lets you showcase your style and creativity in every outfit. Whether you’re making bold statement pieces or subtle everyday accents, DIY projects let you design exactly what you want—while enjoying the satisfaction of wearing something you made yourself.


    Frequently Asked Questions

    What’s the easiest DIY jewelry project for beginners?

    Beaded stretch bracelets and hair clips are great starting points—no special tools required and super customizable.

    Where can I buy jewelry-making supplies?

    Try craft stores, online retailers, or repurpose old or broken jewelry for beads, clasps, and chains.

    Can I sell my handmade jewelry?

    Yes! Once you’ve perfected your designs, consider setting up an online shop or selling at local markets. Custom pieces are always in demand.

    How do I make sure my jewelry is durable?

    Use quality materials, seal finishes properly, and test your pieces before wearing or gifting. Practice makes perfect!

    Are there kid-friendly jewelry crafts?

    Absolutely—friendship bracelets, shrink plastic charms, and button necklaces are fun, safe, and easy for kids to make.

    © 2025 GardeningandDecor.com. All rights reserved.

  • How to Make Your Own Candles and Soaps

    How to Make Your Own Candles and Soaps

    How to Make Your Own Candles and Soaps

    If you love creating cozy vibes and luxurious self-care gifts, learning how to make your own candles and soaps is a rewarding and surprisingly simple hobby. These handmade items are perfect for your home, thoughtful gifts, or even as the start of a small business. With just a few ingredients and tools, you’ll be crafting beautiful, fragrant creations in no time.


    Supplies for Candle Making

    Here’s what you’ll need to get started:

    • Soy wax, beeswax, or paraffin wax
    • Wicks (pre-tabbed cotton wicks are great for beginners)
    • Heat-safe containers (mason jars, tins, or mugs)
    • Fragrance oils or essential oils
    • Candle dye (optional)
    • Double boiler or microwave-safe bowl
    • Thermometer (to monitor wax temperature)
    • Wick holders or popsicle sticks

    Basic Steps for Candle Making

    1. Melt the wax slowly in a double boiler or microwave.
    2. Once melted, allow it to cool slightly (around 130–140°F) before adding fragrance and dye.
    3. Secure the wick in the center of your container using a wick holder or glue.
    4. Carefully pour the wax into the container.
    5. Let the candle sit undisturbed until fully hardened—usually several hours.
    6. Trim the wick to about ¼ inch before lighting.

    Supplies for Soap Making

    Soap making is just as fun and comes in two beginner-friendly styles: melt-and-pour or cold process. For ease, we’ll focus on melt-and-pour:

    • Melt-and-pour soap base (glycerin, shea butter, goat’s milk, etc.)
    • Soap molds (silicone molds are easiest)
    • Essential oils or soap-safe fragrance oils
    • Natural colorants (mica powders, clays, or food-safe dyes)
    • Add-ins (dried flowers, oats, coffee grounds, or herbs)
    • Microwave-safe bowl or double boiler

    Basic Steps for Soap Making

    1. Cut your soap base into small cubes and melt it gently.
    2. Add your desired fragrance, colorants, and add-ins once the base is fully melted.
    3. Pour the mixture into molds and let it cool completely (1–2 hours).
    4. Pop the finished soaps out of the molds and wrap them in paper or airtight bags for storage or gifting.

    Creative Ideas and Customizations

    • Layered candles or soaps with different colors or scents
    • Holiday-themed molds for festive gifts
    • Herb-infused oils for soothing scents and skincare benefits
    • Personalized labels and tags for a professional finish

    Conclusion

    Making your own candles and soaps is a hands-on way to bring comfort, creativity, and wellness into your daily life. These simple DIYs let you control the ingredients, scents, and designs while crafting meaningful gifts and indulgent treats. Once you start, you’ll find endless possibilities to personalize and enjoy.


    Frequently Asked Questions

    What’s the best wax for beginners?

    Soy wax is affordable, clean-burning, and easy to work with—making it ideal for beginner candle makers.

    Can I use kitchen tools for soap and candle making?

    It’s best to have separate tools for crafting, especially if you’re using fragrance oils or dyes not meant for food use.

    How long do homemade candles and soaps last?

    When stored properly, candles can last over a year. Soaps typically last up to 6–12 months before scents or lather may fade.

    Are essential oils safe in candles and soaps?

    Yes—just make sure to use high-quality oils and follow usage guidelines for safe concentration levels.

    Can kids help with these projects?

    Yes! Older kids can assist with pouring, scenting, and decorating—just be sure an adult handles the heating and safety steps.

    © 2025 GardeningandDecor.com. All rights reserved.